
These are settings (or ranges) that work well with the Morristown Makers 3D printer. You are welcome to deviate from these settings for testing, but it is recommended that you change one parameter at a time so that you know the effect each change has.
Printer-Level Settings
These are the sections and settings inside Cura 4.1. You should only need to set this up one time in your slicer and then never have to change the settings for this printer in the future.
Printer Tab
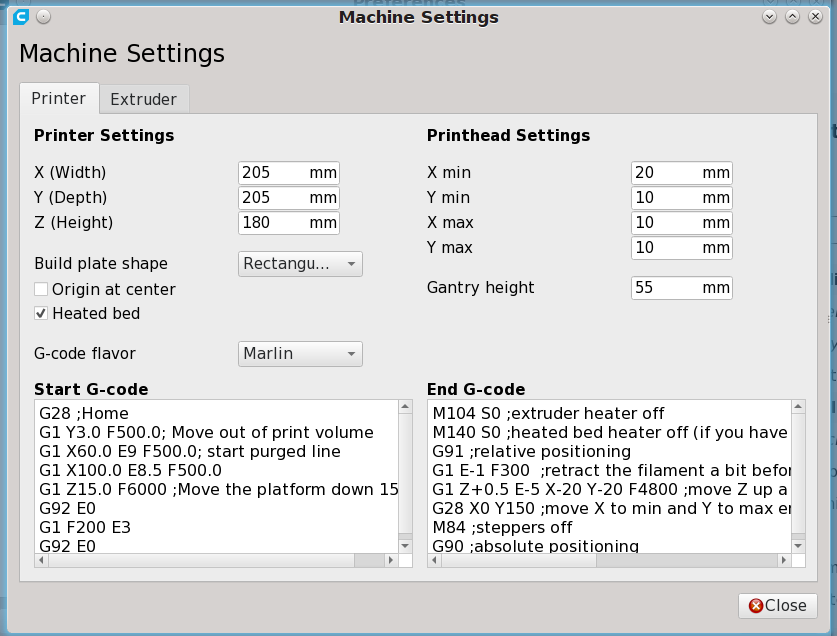
Printer Settings
- X, Y, Z: 205, 205, 180
- Build plate shape: Rectangular
- Heated bed: Yes
- G-code flavor: Marlin
Printhead Settings
- X min: 20 mm
- Y min: 10 mm
- X max: 10 mm
- Y max: 10 mm
- Gantry height: 55 mm
Start and End G-code Settings
These are the settings that were in use when the printer was donated to Morristown Makers. You can change the start and end G-code as needed. Or, you can use a generic start and end code.
Start G-code:
;*** Start Dual Nozzle/Bed Preheating ***
M140 S{material_bed_temperature_layer_0} ; start preheating the bed
M104 S{material_print_temperature_layer_0} T0 ; start preheating hotend
G28 ; home
M190 S{material_bed_temperature_layer_0} ; heat to Cura Bed setting
M109 S{material_print_temperature_layer_0} T0 ; heat to Cura Hotend
;*** End Preheating ***
G92 E0 ;Reset Extruder
G1 Y3.0 F500.0 ;Move out of print volume
G1 X60.0 E9 F500.0 ;start purge line
G1 X100.0 E8.5 F500.0
G1 Z15.0 F6000 ;Move the platform down 15mm
G92 E0 ;Reset Extruder
G1 F200 E3
G92 E0 ;Reset Extruder
End G-code:
M104 S0 ;extruder heater off
M140 S0 ;heated bed heater off (if you have it)
G91 ;relative positioning
G1 E-1 F300 ;retract the filament a bit before lifting the nozzle, to release some of the pressure
G1 Z+0.5 E-5 X-20 Y-20 F4800 ;move Z up a bit and retract filament even more
G28 X0 Y150 ;move X to min and Y to max endstops, so the head is out of the way
G92 E0
M84 ;steppers off
G90 ;absolute positioning
Extruder Tab
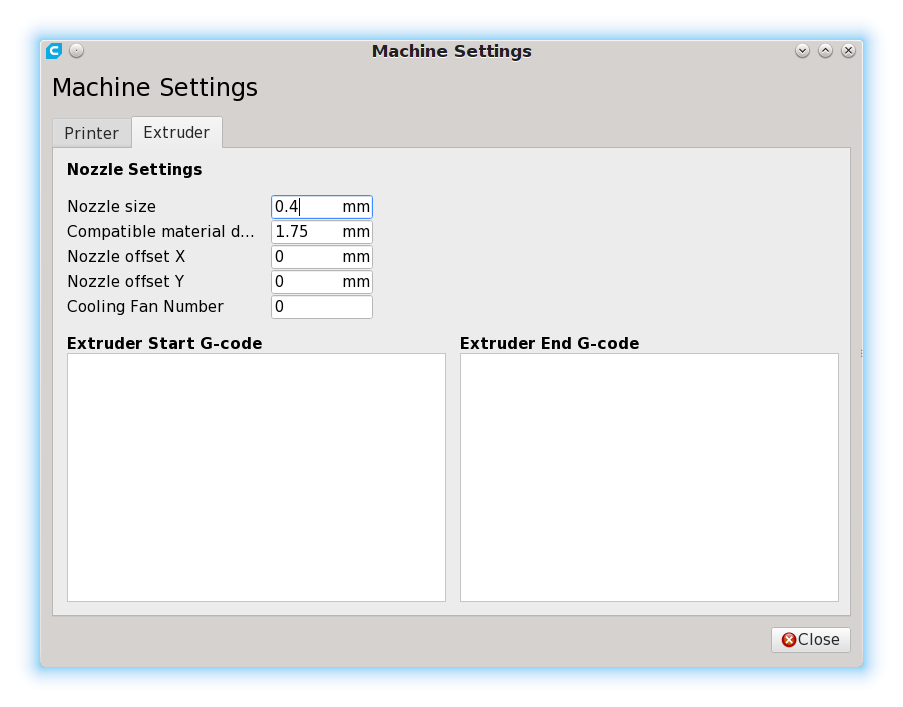
Nozzle Settings
- Nozzle size: 0.4 mm
- Compatible material diameter: 1.75 mm
- Nozzle offset X: 0 mm
- Nozzle offset Y: 0 mm
- Cooling Fan Number: 0
Per Model Settings
The per-model settings can be downloaded and imported into Cura as a profile. This was exported from Cura 4.1, but you should be able to import it into the current Cura version. Unzip the the archive and import the .curaprofile into Cura.
Layer Height
0.1 to 0.2
0.16 seems to be a good compromise between speed and quality.
Initial Layer Height
0.16: This should always be 0.16 regardless of the layer height you set for all the other layers.
Line Width
0.4: This is the nozzle diameter. You can adjust this up and down a little, but generally it should not be changed. This is typically always set to your nozzle diameter.
Shell Thickness
Wall Thickness
0.8: This means 2 outside perimeters. You can increase this in 0.4 mm increments (i.e., 0.4, 0.8, 1.2, 1.6, etc.).
Top and Bottom Thickness
0.8: This is determined by how many solid layers you want on top and bottom multiplied by your layer thickness. If you are printing 0.16 layers and want 5 solid top and bottom layers, you will have a 0.8 mm thickness.
Retraction
Yes: Enable retraction almost always. Flexible filaments print better without retraction.
6 mm
Infill Density
25%: This can go up or down depending on your needs. But 25% is a good mix between strength and speed.
Temperature
Printing Temperature (Hotend)
205° C: This is material specific. Different filaments (even regular PLA from the same manufacturer) will need different temperatures. Generally, all the PLA used on this machine prints well in the 205° range. Adjust as necessary.
Build Plate Temperature (Heated bed)
50° C: Technically PLA does not need a heated bed. However, having some heat on the bed seems to help with adhesion.
Print Speed
30-60 mm/s: There is a marked quality difference between 30 and 60 mm/s (slower is better). However, you can expect that it will take approximately twice as long to complete a print at 30 mm/s as it does 60 mm/s.
Recommended 50 mm/s: This printer can print accurately up to 70 mm/s but quality suffers.
Cooling
Enable Print Cooling
Yes
Fan Speed
80%: Faster than this and the hotend struggles to stay up to speed. And, at 80% it cools sufficiently.
Supports
Depending on your needs
Build Plate Adhesion
Depending on needs, but a skirt of at least 1 perimeter is recommended to help prime the printer.